Most home raw-feeding accidents don't happen in the freezer. They happen between the freezer and the bowl. The freezing protocol is the easy part — once meat is below -18 °C, it stays safe almost indefinitely. Thawing is where most owners lose ground without realising it: counter thawing, microwave shortcuts, "I'll just put it out for an hour" decisions that quietly multiply the bacterial load by orders of magnitude.
This guide is the complete protocol for the in-between — what freezing actually kills, what it doesn't, and the only thawing methods that don't undo the whole point of careful sourcing. If your raw routine has a weak spot, this is almost certainly where it is.
What this guide covers. This is one of the guides in our Raw Food Safety series — the one focused specifically on the cold-chain protocol from delivery to bowl. For the broader playbook (sourcing, kitchen hygiene, feeding, what to do if something goes wrong), see the main Raw Food Safety guide. For the upstream end of the protocol (where the meat comes from before freezing), see our sourcing guide.
What Freezing Actually Does (and What It Doesn't)
A surprising number of raw-feeding articles treat freezing as a sterilization step. It isn't. Understanding what freezing actually accomplishes is the foundation of everything that comes after.
What freezing kills: Parasites. The standard reference temperature is -18 °C / 0 °F, held for at least three days, which kills nearly all parasites relevant to pet feeding — Toxoplasma gondii, Sarcocystis, Trichinella, and the common tapeworm species. Some deep-frozen protocols (-23 °C / -10 °F for 7 days) are used commercially for extra margin. For home freezing, -18 °C for 3+ days is the floor; we run our freezer at -20 °C / -4 °F as a safety margin.
What freezing does not kill: Bacteria. Salmonella, E. coli, Listeria monocytogenes, Campylobacter — none of these die at freezer temperatures. They become inactive (frozen, can't multiply, can't shed toxins) but they survive in dormancy and reactivate within minutes once the meat thaws back into the temperature range where bacteria multiply (more on this below). Long freezing reduces bacterial loads modestly through cellular damage and slow die-off, but a year-old frozen bag is not bacteriologically sterile.
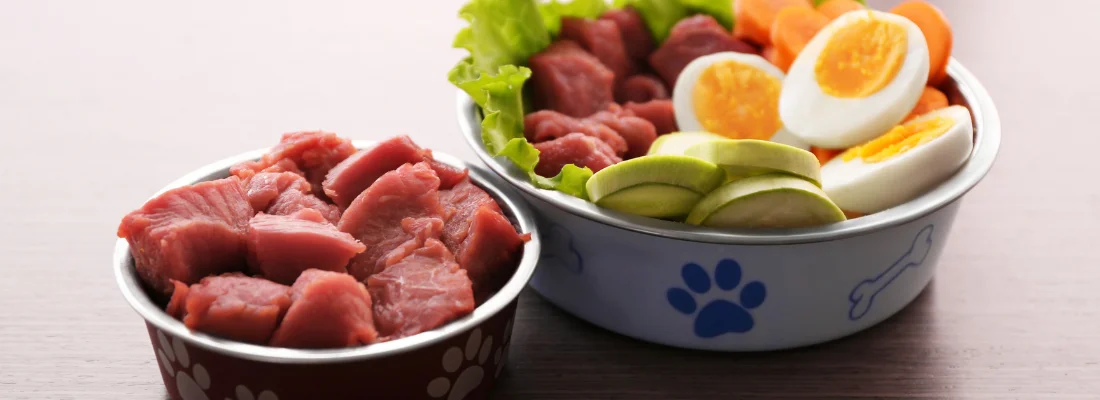
What this means for the protocol: Freezing is one layer in a multi-layer safety stack. Sourcing keeps the initial bacterial load low. Freezing handles parasites. Thawing has to be fast enough that bacteria don't multiply. Kitchen hygiene prevents whatever is on the meat from cross-contaminating ready-to-eat food in the household. No single layer is sufficient on its own. Failures cascade.
The Freezer Itself: Temperature, Capacity, Maintenance
Before any food goes in, the freezer has to actually hold its target temperature. Most home freezers run a few degrees warmer than their dial suggests, and a freezer that drifts toward -10 °C is not safe for raw pet feeding.
Temperature target. -18 °C / 0 °F is the floor for parasite kill at the standard 3-day duration. -20 °C / -4 °F is a sensible safety margin for households new to raw, and it's what we run. Below -23 °C / -10 °F you start losing efficiency without meaningfully more safety; above -15 °C and you're outside the published parasite-kill envelope.
Verify, don't trust. A separate freezer thermometer (one that lives inside the freezer, not the dial on the door) is the only way to know what your freezer is actually doing. We keep a wireless model that alerts us if the freezer warms unexpectedly — power outages, doors left ajar, failing seals — before the meat is compromised. See the sourcing guide's TopPicks for the model we use.
Capacity. A typical 25 kg / 55 lb doodle eats about 1.5 lb of meat a day, or ~45 lb a month. If you're buying in bulk for one dog, plan on 50–60 lb of freezer capacity per month of feed. Multi-dog households scale linearly. A standard above-fridge freezer holds 1–1.5 months of bulk raw for one doodle; a small chest freezer (5–7 cu ft) holds 2–3 months for a multi-dog household. We use a dedicated chest freezer.
Maintenance:
- Defrost annually if it's not frost-free. Frost buildup makes the freezer less efficient and warmer at the food.
- Don't overload. Air needs to circulate. A jammed freezer runs warmer at the centre.
- Don't open repeatedly to "check" things. Every door opening warms the inside; the temperature recovery cycle stresses the compressor.
- Check seals quarterly. A failing seal lets warm air in continuously and the freezer over-cycles to compensate, eventually losing the battle.
Freezing Protocol: From Delivery to Frozen
What happens between meat arriving at your door and meat being safely frozen.
The two-hour rule. Raw meat shouldn't sit at room temperature for more than two hours total — counted across the journey from supplier to your freezer. If your supplier ships dry-iced overnight, the clock starts when you take the box inside. If you pick up frozen meat from a wholesaler, the clock starts when it leaves their freezer.
Inspect on arrival:
- Box should arrive cold to the touch. Any obviously thawed meat — soft to the touch, with visible thaw juice — is a problem. For commercial shipments, take a photo and contact the supplier; reputable suppliers replace shipments that arrive warm.
- Check freeze-state on the bottom packs (top packs warm fastest in transit).
- Smell test: thawed-and-refrozen meat sometimes has an off odor even when frozen again. Trust the smell.
Portioning:
If your meat arrives pre-portioned in ready-to-freeze packaging (most reputable raw-feeding suppliers ship this way), the portioning step is already done. Move the bags directly into the freezer. This is what we do — our wholesaler ships portioned bags that go straight from the box into the freezer with no extra handling.
If your meat arrives bulk (from a butcher or local co-op), portion before freezing:
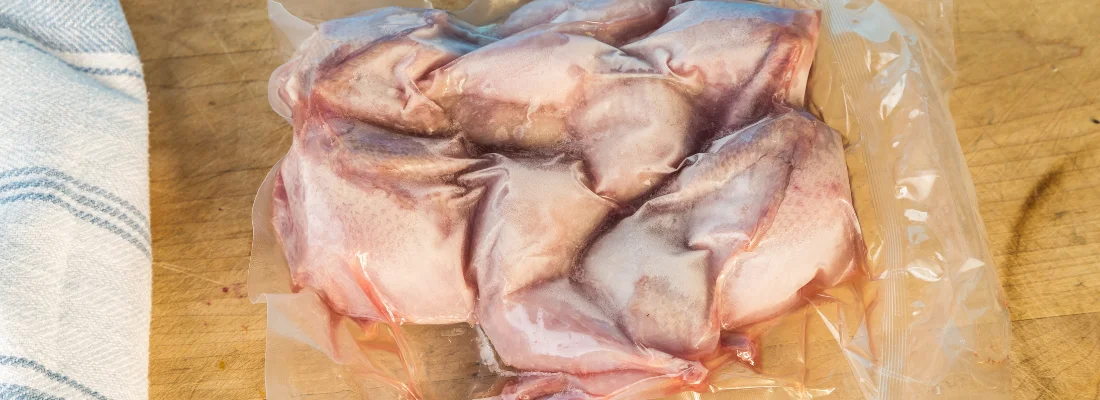
- Use vacuum-sealed bags, daily-portion-sized. Vacuum-sealing prevents freezer burn and extends usable storage from a few months to closer to a year.
- Don't freeze a 20 lb block as a single unit — you'll have to thaw the whole thing to use any of it, which forces you to refreeze partially thawed meat (don't).
- Split into the smallest portion size you'll actually use. For a single 25 kg doodle, that's ~1.5 lb per day. For a multi-dog household, scale up to per-meal portions.
Marking and dating:
Every bag should be labeled with the date it was frozen and the protein. We use a kitchen marker on the bag itself. The marking lets you rotate stock — first in, first out — and catches any meat that's been in the freezer longer than the recommended storage window.
Storage windows we use:
- Muscle meat (raw, vacuum-sealed): up to 6 months at -20 °C
- Organ meat (raw, vacuum-sealed): up to 3 months — organs are higher in fat and degrade faster
- Ground meat (any protein): up to 4 months — more surface area, oxidises faster
- Whole bones (raw, sealed): up to 6 months
- Eggs (in shell): up to 9 months frozen; out of shell up to 6 months in airtight container
After these windows, meat is still safe but quality drops — fat oxidation, freezer burn, texture changes. We use within window or compost.
What goes wrong in the freezing step:
- Slow freezing — meat that takes overnight to fully freeze (because the freezer is overloaded or warm) builds larger ice crystals that damage cell walls, releasing more water during thaw and changing texture.
- Refreezing partially thawed meat — multiplies bacterial load each cycle. We never do this.
- Stacking warm packs on top of frozen ones — warms the lower packs back into the danger zone temporarily. Add new packs to the side or bottom of an established freezer load.
- Mixing raw pet meat with human-food storage without a divider — risks spillage onto produce or ready-to-eat food.
Thawing Protocol: Where Most Home Accidents Happen
This is the section worth reading twice. Thawing is where almost every preventable raw-feeding mistake actually happens, because it feels low-stakes — "I'll just put it out for an hour" — and the consequences aren't visible.
The Danger Zone
Bacteria multiply fastest in the temperature range of roughly 4 °C to 60 °C / 40 °F to 140 °F. This range is the "danger zone." Below 4 °C, bacterial growth slows to near-zero. Above 60 °C, bacteria die. In between, populations can double every 20 minutes under good conditions.
Frozen meat thawing on a counter spends hours in the danger zone — sometimes all day. By the time it reaches the bowl, the bacterial load can be many times higher than what came out of the freezer. Even meat sourced from a clean supplier and frozen properly becomes contaminated through the act of unsafe thawing.
The protocol below is built around keeping meat out of the danger zone for as long as possible, and out completely until the moment of feeding.
The Only Acceptable Thawing Methods
1. Refrigerator thawing. This is the gold standard. Move tomorrow's portion from the freezer to the bottom shelf of the refrigerator the night before. The fridge holds at ~2-4 °C, which is below the danger zone, so bacteria barely multiply during the entire thaw. Most daily portions thaw fully overnight (12-16 hours). Larger portions (multi-dog households, week's-worth bulk thawing) take 24-36 hours.
Thawed meat keeps in the fridge for 24-48 hours before feeding. We try to use within 24.
2. Cold-water thawing. For emergency same-day thawing, use cold water:
- Keep the meat in its sealed bag.
- Submerge fully in cold (not lukewarm) water in a bowl or sink.
- Change the water every 30 minutes — the water surrounding the bag warms up and slows the thaw.
- A 1 lb portion thaws in about 1 hour. A 3 lb portion takes 2-3 hours.
- Use the thawed meat within 4 hours of thaw completion. Do not refreeze.
Cold-water thawing keeps the meat below the danger zone if you change the water often enough. It's emergency-only — refrigerator thawing should be the default.
Methods to Never Use
- Countertop thawing. Bacteria multiply exponentially in the danger zone. A 2 lb portion thawing on a kitchen counter spends 4-6 hours in the danger zone, during which bacterial counts can rise by orders of magnitude. This is the single most common cause of preventable raw-feeding illness.
- Microwave thawing. Microwave defrost cycles produce uneven heat — partially cooked spots while leaving cold cores. Bacteria survive in the cold parts. The texture change is also wrong for raw feeding (partially cooked meat behaves differently in the gut). Just don't.
- Hot water thawing. Same issue as microwave plus accelerated bacterial growth. The whole bag spends time in the danger zone.
- "It thawed during the day." If meat has been at room temperature more than two hours total, throw it out. Two hours is the upper bound for safe room-temperature exposure under good conditions, and most counter-thawed meat exceeds it. The cost of a wasted portion is far less than the cost of a sick dog or a sick human.
Our Daily Thawing Routine
For our three doodles:
- Evening (around 18:00): Move tomorrow's portions from freezer to fridge. By morning, they're fully thawed and ready to feed.
- Morning (around 07:00): Breakfast goes from fridge straight to bowl. Bowl down for the meal, picked up after.
- Around 17:00: Dinner portions thaw in the fridge during the day (we move them down before leaving in the morning if dinner won't be a fridge-overnight portion). Dinner goes from fridge to bowl around 18:00.
We never improvise. We never thaw on the counter. We never microwave. The protocol takes 30 seconds of planning the night before and never produces a thaw-related emergency.
What to Do If Power Goes Out
Unexpected power outages are the most common situation where the protocol stress-tests itself. Three rules:
1. Don't open the freezer. A full freezer with the door kept closed holds safe temperatures (below -10 °C / 14 °F) for 48 hours. A half-full freezer holds for about 24 hours. Every door opening shortens that window dramatically.
2. Have a thermometer that records minimum temperature. Most freezer thermometers track the lowest temperature reached during the outage. When power returns, you can tell whether the freezer actually crossed into the bacterial-multiplication range or stayed safe.
3. Decide based on temperature, not appearance. When power returns:
- If the meat is still hard-frozen and the thermometer shows the freezer never went above -8 °C, you're fine. The meat is safe to keep frozen.
- If meat has partially thawed but still has ice crystals on the outside and the freezer stayed below 0 °C, you can refreeze — once. Mark the bag with "refrozen [date]" and use within a month.
- If meat is fully thawed (no ice, soft to touch) and the freezer warmed above 4 °C, treat the same as countertop-thawed meat: feed within the next 24 hours OR cook OR throw out. Do not refreeze fully thawed meat.
For longer outages (24+ hours predicted), most households should move what they can salvage to a working freezer at a neighbour's house or a commercial freezer (some grocery stores rent space during disasters). For small batches, cooking the meat and feeding it cooked over the next two to three days is a viable salvage path.
Refreezing: The Honest Rules
The default rule in raw-feeding circles is "never refreeze." It's almost always right, but the nuance matters.
Don't refreeze:
- Fully thawed meat that's spent more than four hours above fridge temperature
- Any meat that's already been thawed and partially fed (the fed portion is on a different microbial trajectory than the rest)
- Ground meat that's been thawed (more surface area, more oxidation, more risk)
- Meat that's been left in the bowl
Refreezing acceptable, with caveats:
- Power-outage meat that stayed below 0 °C — refreeze once, mark the bag, use within 30 days, watch the dog's stool quality the first time you feed each refrozen portion as an early-warning signal.
- A bag pulled from the freezer to the fridge that the dog refused, returned to the fridge unopened — can be refrozen if it's been refrigerated less than 24 hours total. Use within 30 days.
The principle: every freeze-thaw cycle damages cells, releases more water and nutrients, and gives surviving bacteria more substrate to grow on. One refreeze is sometimes acceptable; two is not.
Storage Rotation: First In, First Out
The simplest system is a labeled rotation. Newer bags go to the back of the freezer; older bags get moved forward as new ones arrive. Every two weeks, scan the front of the freezer for anything approaching its storage window. Use those first.
Our bag-marking convention:
- Date frozen (DD/MM/YY)
- Protein (HORSE, LAMB, PORK, VENISON, TURKEY)
- Format (NUGGETS, PATTIES, GROUND, WHOLE)
Three pieces of info, one line, written with a kitchen marker. Two minutes per delivery. Saves us from accidentally feeding 9-month-old freezer-burned meat or losing track of organ meat that should have been used months ago.
What to Watch for in Your Doodle After a Refrozen or Borderline Portion
If a portion has been through any unusual cold-chain event (refreeze, longer-than-usual fridge thaw, supplier shipment that arrived warm but was salvaged), watch the dog's stool quality and energy for the next 48 hours.
Soft stools or one episode of vomiting within 24 hours of feeding a borderline portion is a signal — back to a known-safe portion, give the gut 48 hours to settle, and consider whether to feed that supplier again. Severe diarrhea, repeated vomiting, lethargy, or any blood in stool means stop the protein, save a sample, and call the vet.
Frequently Asked Questions
The Bottom Line
Freezing handles parasites, not bacteria. Thawing in the fridge or in cold water keeps the bacterial load in check between freezer and bowl. Anything else — counter thawing, microwave, refreezing fully-thawed meat — undoes the work that careful sourcing and freezing did.
The protocol is simple in principle and almost frictionless once it's habit: portion before freezing (or buy pre-portioned), mark every bag, run the freezer at -20 °C, move tomorrow's portions to the fridge each night, and never improvise on thaw method. Most days it takes 30 seconds of planning. The 30 seconds is what makes raw-feeding a sustainable practice instead of an accident waiting to happen.
For the broader safety protocol that surrounds this — sourcing, kitchen hygiene, feeding routines, what to do if something goes wrong — see the main Raw Food Safety guide. For the upstream end (where the meat comes from), see the sourcing guide.